

How to upload or update a photo
If your license does not have a photo on it, or if you would like to replace your photo, here’s how.
- Log in to your eLIPSE account.
- On your Home page, click My Dashboard and then Licenses And Permits.
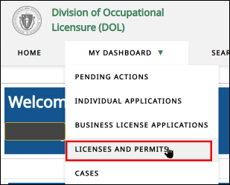
- Locate the license you want to work with, and then click the View License Details control below it.

- At the top of the box that eLIPSE displays, click the Go to your License Record and Print License button.

- eLIPSE displays the license. On the right side of the screen, click the Print License button.

- eLIPSE displays the Print License dialog box.
- Click the Upload New Photo radio button.
- Click Next.

- eLIPSE displays the Print License box.
- Click Upload New Photo.
- Click Next.
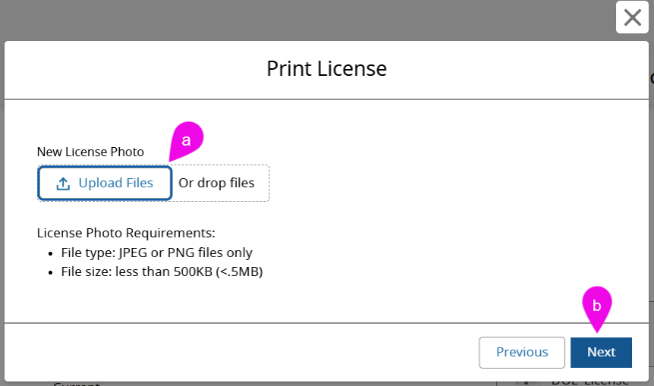
- Attach the photo as you do when attaching a document to an email.
As a reminder, your photo file must be:- Only a JPEG or PNG file.
- Smaller than 500KB (or .5MB)
- eLIPSE displays an Upload Files box. Click Done.
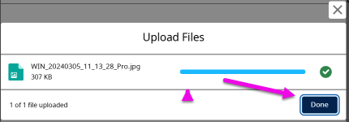
- eLIPSE takes you back to the Print License dialog box. Click Next.
- eLIPSE confirms it is printing your license. Click Finish.
- eLIPSE takes you back to your license details page, and your new license card is listed on the right side of the screen under Files.
The next time you print or download that license file from that Files section, it will have your new photo.
Questions?
If you have more questions about attaching or updating a photo for a license or permit, please contact the appropriate board.
Contact
Online
Phone
MassRelay (TTY & ASCII)
Call Division of Occupational Licensure, MassRelay (TTY & ASCII) at 711