About bear meat
Black bear meat is a healthy and delicious source of protein along with iron, phosphorus, and vitamins B1, B2, and B3. Learning how to prepare and cook meat from a bear that you harvested can be extremely rewarding. Since bears can be carriers of Trichinella spiralis (the parasites that can cause the disease trichinosis in humans), it’s important to carefully follow the cooking techniques below to make sure your bear meat is safe to eat.
- The internal temperature of the thickest part of the meat needs to reach 165°F for at least 3 minutes. Heating the meat to an internal temperature of 170°F is an easy way to ensure that it’s thoroughly cooked.
- Cook until there is no trace of pink meat or fluid, paying close attention to the areas around joints and close to the bone.
Field dressing and meat preparation
- Upon harvesting a bear, and after attaching your harvest tag, you should immediately field dress the animal. Get information about reporting your bear harvest.
- Once field dressed, it is important to cool the meat as quickly as possible. Skinning the bear can help cool the meat. If skinning isn’t possible right away, you can pack the abdominal cavity with ice until you are able to skin and butcher it.
- When the bear is skinned, trim the fat layers away from the underlying red meat. The fat can be retained and later rendered down into bear grease/lard. The grease can be used as a cooking oil or to make a variety of pastries/pies.
- The remaining butchering process is like any other big game animal and depends on your personal preferences (steaks, roasts, stew meat, grind, etc.). The best steaks come from the loin (aka backstraps). You can cut several large roasts from the front and hind quarters and reserve the rest for stew meat and/or grind into burger.
Read more about best practices for wild game processing and preparation.
Candied bear backstrap recipe
This recipe was adapted from a recipe by the Manitoba Wildlife Federation and can make 2–3 pounds of bear backstrap.
Marinade
- ¼ c. soy sauce
- 1 c. cola
- ½ c. brown sugar
- 4 tbsp. Dijon mustard
- ¼ c. of olive oil
- 4 tbsp. Worcestershire sauce
- 6 cloves garlic, minced
- 1 tbsp. dry mustard
- 2 tbsp. balsamic vinegar
- 2 tsp. ginger
- 2 tsp. crushed thyme
Directions
- Combine and mix all marinade ingredients until blended.
- Put 2–3 lbs. of bear backstrap in a sealable plastic bag and pour the marinade over the meat until completely covered.
- Let the meat marinate for at least 24 hours in the refrigerator.
Glaze
- ½ c. of brown sugar
- 1 tbsp. cornstarch
- 1 tsp. dry mustard
- 1 tbsp. butter
- 2 tbsp. balsamic vinegar
- ½ c. of cola
- Salt and pepper to taste
Directions
- Remove marinated meat from the refrigerator and allow it to come up to room temperature.
- Prepare glaze by mixing all ingredients in a saucepan. Simmer on low and stir to thicken the glaze.
- Set your grill to 350°F
- Place marinated bear backstrap on the grill to cook over direct heat. Flip after 10 minutes and brush on the glaze. Allow it to cook for another 10 minutes over direct heat and flip again, brush the glaze on the other side, and move the backstrap to the side of the grill to continue cooking over indirect heat.
- Continue cooking and glazing until the meat reaches an internal temperature of at least 170°F in the thickest part. Total cook time should be 30–45 minutes, depending on the thickness of the backstrap.
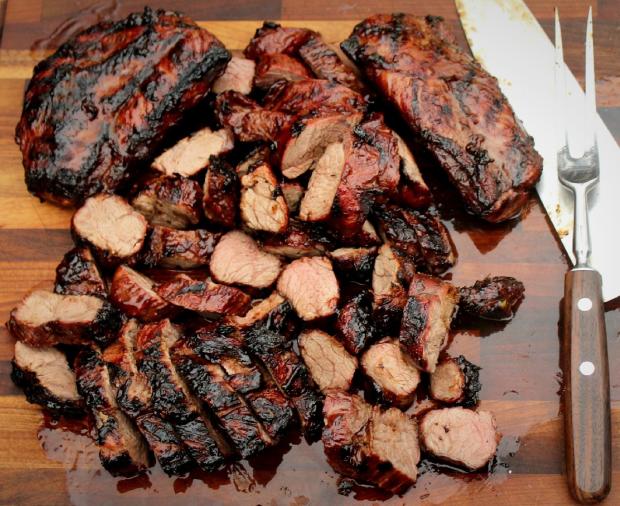
- Remove meat and let it rest for 10 minutes under aluminum foil. Cut into medallions and serve.
How to render bear fat
With minimal effort, you can get the most out of your harvested bear by rendering the fat into grease. Similar to store-bought lard, you can use bear fat to make biscuits, cookies, and pastries.
You will need: gallon-sized freezer bags, pint or half pint canning jars, lids, cheese cloth, funnel, meat grinder (optional)
Rendering:
- Set aside fat layers during the butchering process and pack into large freezer bags. Be sure to remove any traces of red meat.
- Freeze fat until you are ready for rendering. Freezing makes the fat easier to cut and process and allows you to make smaller batches at your convenience.
- When ready, remove the fat from the freezer and allow it to thaw about halfway and still very firm, and then cut into 1-inch cubes. Tip: To maximize the amount of oil/grease you get, run the fat through a meat grinder before rendering it.
- Place the fat (either cubes or grind) in a large pot over low heat (225–275°F) and stir almost constantly. Depending on temperature, it should take about 10–25 minutes to render the fat into liquid. Continue heating and stirring until about 90% of the solid fat has liquified.
- Skim off any large pieces of skin or un-melted fat.
Storing:
- Line a funnel with several layers of cheese cloth. Pour the liquified fat through the funnel and into the jar. The cheese cloth will filter out any remaining solid bits.
- Allow fat to cool for 10–15 minutes and then put a lid on each jar. Store at room temperature until or freeze for future use. Room temperature grease will keep for about 6 months, frozen grease will keep for over a year.