Registering for MFA Using the Microsoft Authenticator
The following steps will walk you through the Azure MFA registration process.
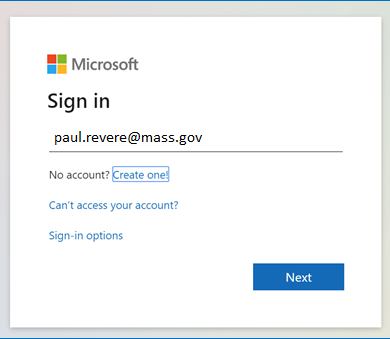
From your desktop browser, please visit Microsoft My Sign-Ins.
- The portal “Sign in” page appears. Enter your work email address and select Next.
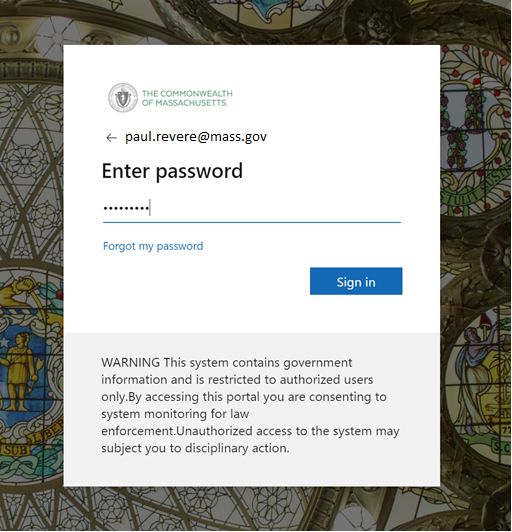
Enter the same password that you use to log on to your work computer.
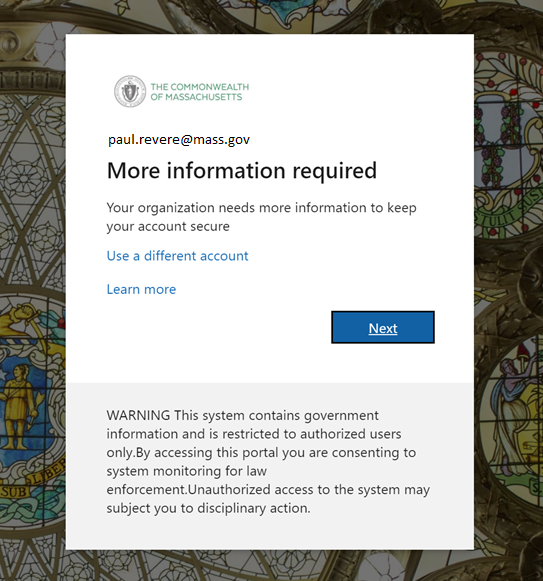
2. You are now prompted to register for MFA. This process should take between 1 to 3 minutes. Click Next.
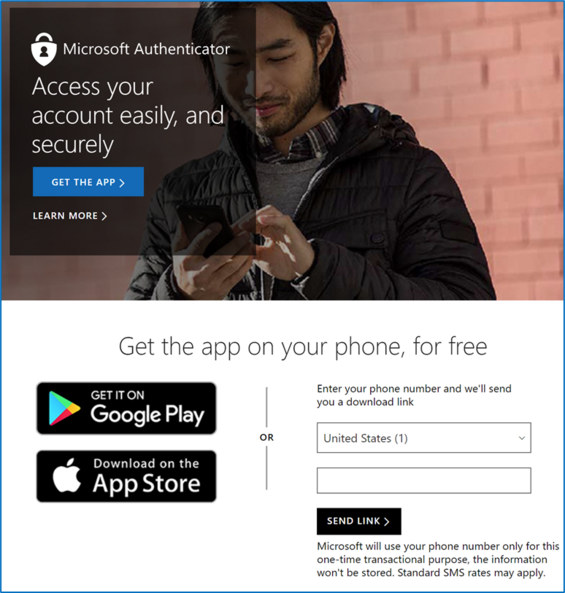
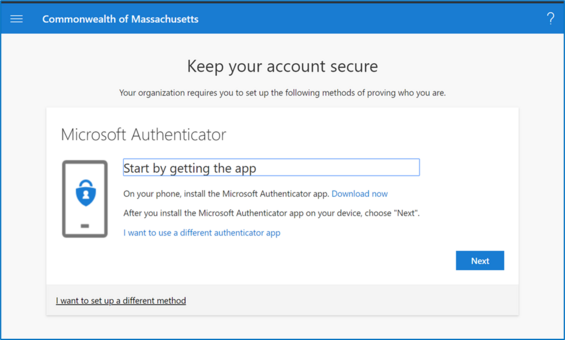
3. Now set up a method of authentication. The default method is the recommended Microsoft Authenticator application, but you can use another authenticator. To download and install the Microsoft Authenticator application on your phone, click Download now on this screen to send an installation text message to your phone.

Note: If you do not have a “smart” phone or do not want to install an authenticator application, click I want to set up a different method. Go to MASS.GOV – Set Up Multi-Factor Authentication to continue setting up this different method.
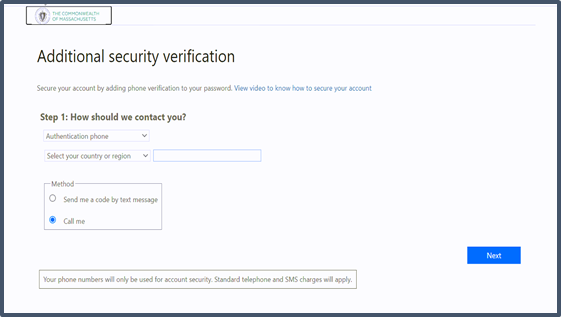
STOP: Important Step
If you are seeing this Additional security verification screen then, click the dropdown to select Mobile App and refer to the Additional Security Verification Job Aid document below before you proceed. If not, please continue to the next step.
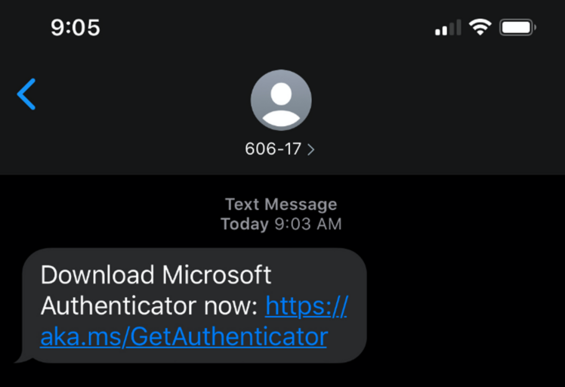
4. Enter your phone number and click SEND LINK
5. You will get a text message on your phone with the link to download Microsoft Authenticator. Select it and install the application.
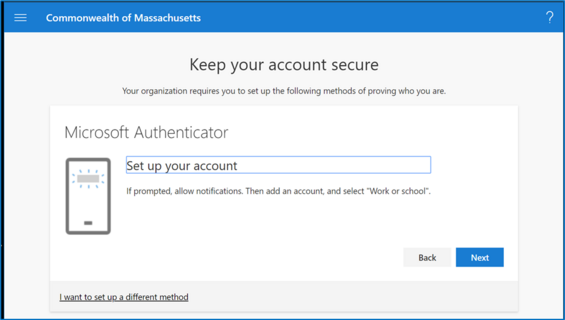
6. Once installed, return to your computer screen and click Next.
7. You will be prompted to set up your account. Click Next.
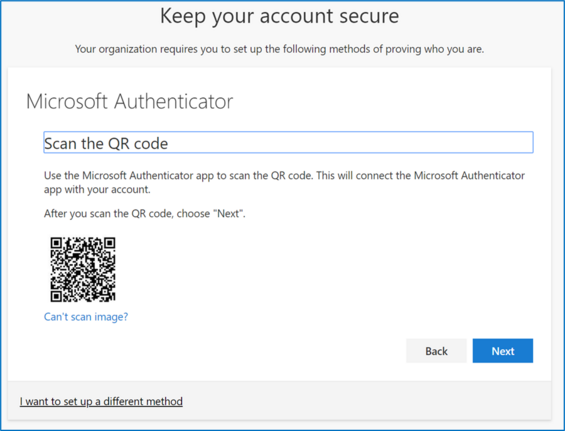
8. A QR (Quick Response) code is displayed on the screen which you will need to read with your smartphone from the Microsoft Authenticator application.

Configuring Authenticator
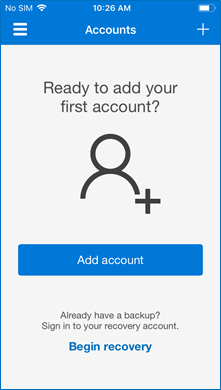
9. Go to your phone and open the Microsoft Authenticator application. Select Add account.
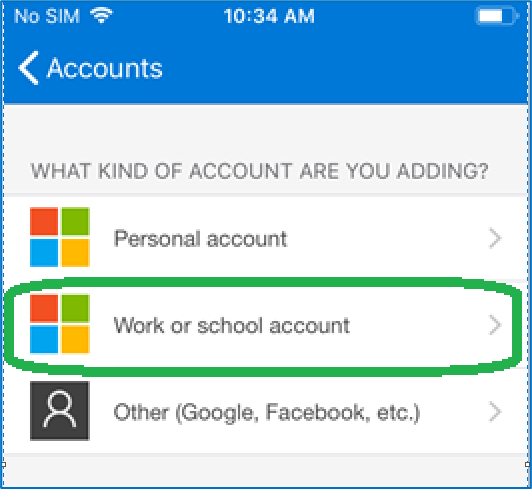
10. Select Work or school account.
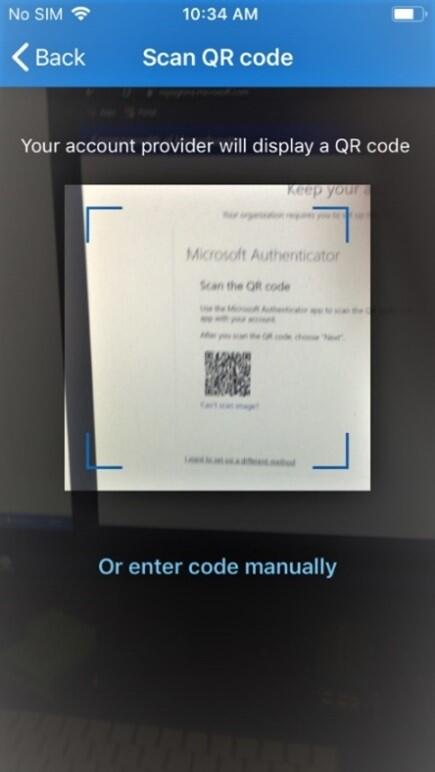
11. The “Scan QR code” screen is displayed on your phone. Scan the QR code on your computer screen with the phone camera. The application will confirm that it successfully scanned the QR code and account setup is complete.
12. Once you have successfully scanned the QR code into the phone, return to the computer screen and click Next.
You will now be prompted to test MFA.
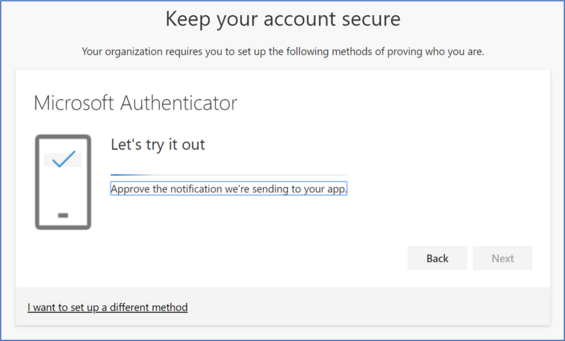
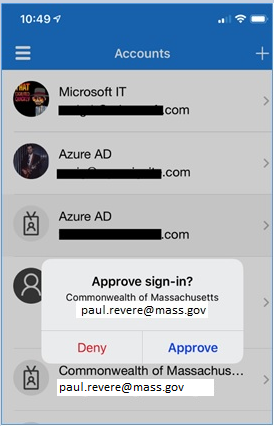
13. An approve request will be sent to your phone. Select Approve.
14. You will receive confirmation on the computer screen.
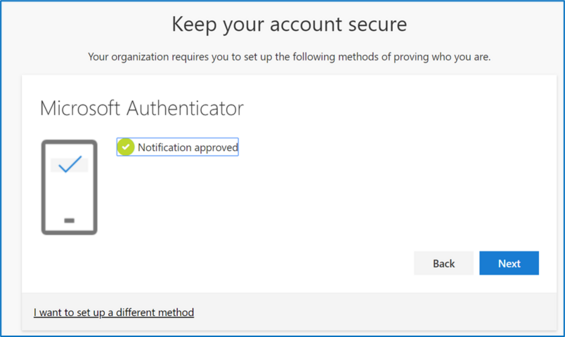
Click NEXT
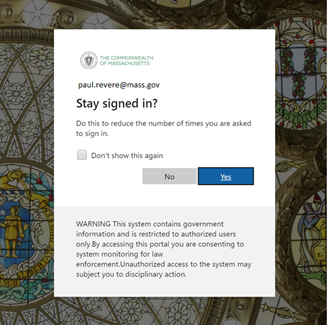
15. The last screen asks if you want to remain signed in. Select Yes.
Enrollment of this method is now complete.
We highly recommend that you add a second authentication method for a separate phone number in case your smartphone is lost, stolen, or otherwise inoperable. To do that, visit MASS.GOV – Set Up Multi-Factor Authentication
Thank you for enrolling in Multi-Factor Authentication