Log in links for this page

Connecting to MassGIS ortho image web services

This guide describes how to add the orthoimagery webservice into desktop and cloud GIS software, and online mapping applications. The illustrations show the example of the 2019 images, but the steps are the same for the 2021 images and any others.

Table of Contents

Instructions for adding the 2019 or 2021 orthos to ESRI’s ArcMap

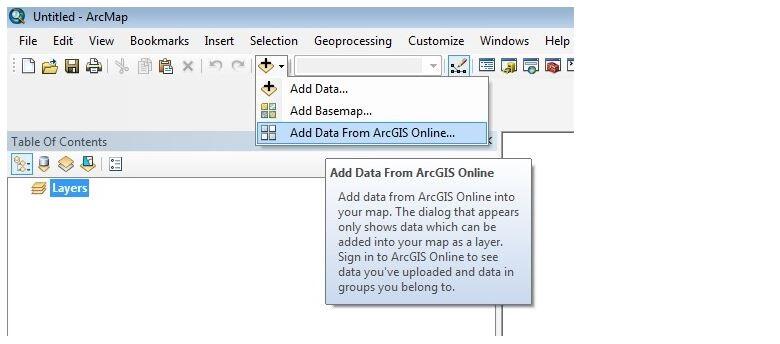
Click the little triangle next to the Add Data button and choose “Add Data From ArcGIS Online…”. (You can also choose Add Data > Add Data From ArcGIS Online… from the File menu).

Adding to ArcMap Step 1

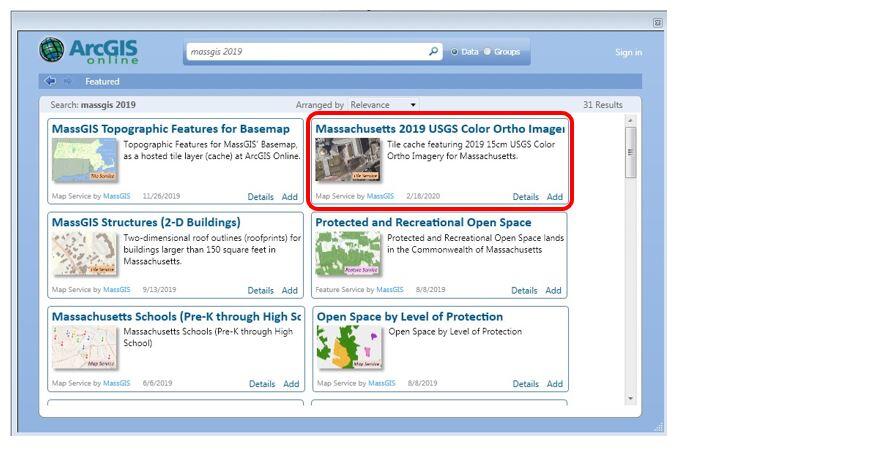
In the ArcGIS Online search box type "MassGIS 2019" or "MassGIS 2021" and hit Enter. Find the tile labeled “Massachusetts 2019 USGS Color Ortho Imagery” or "2021 Aerial Imagery" and click the blue “Add” link in the lower right of the tile.

Adding to ArcMap Step 2

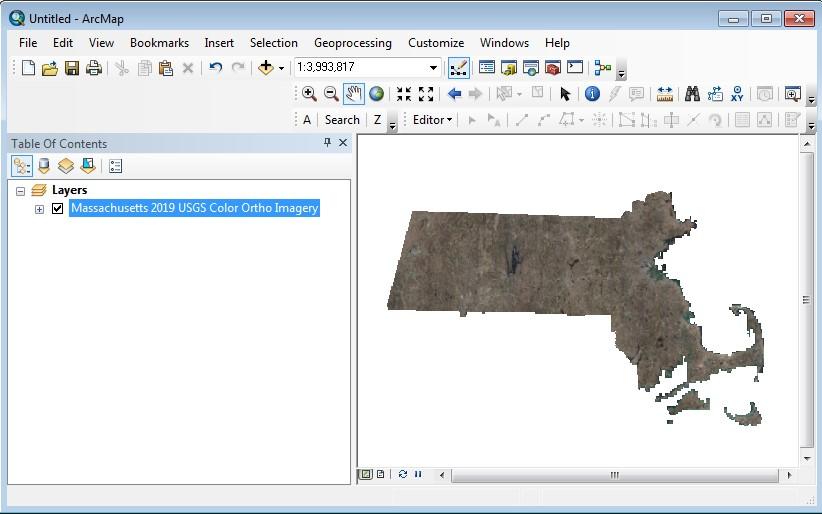
The orthos will add to the map:

adding to arcmap step 3


Instructions for adding the 2019 or 2021 orthos to ESRI’s ArcGIS Pro

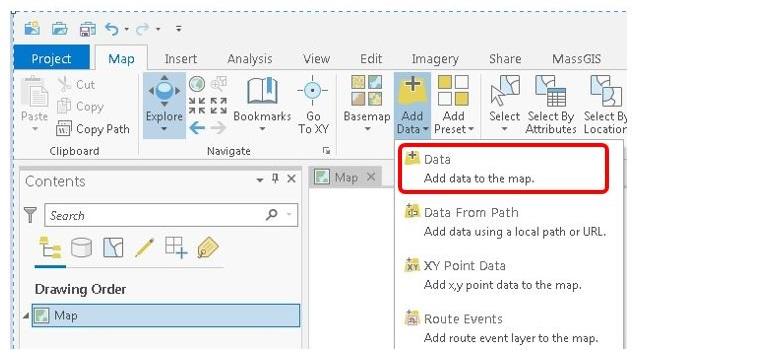
Click on the “Add Data” dropdown in the Layer section

ArcGIS Pro Step 1

Choose “Data - Add data to the map”

ArcGIS Pro Step 2

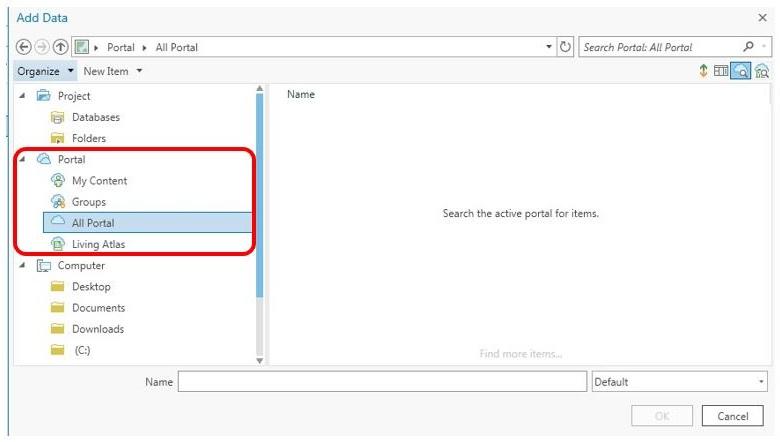
Click on “All Portal” under “Portal”

ArcGIS Pro Step 3

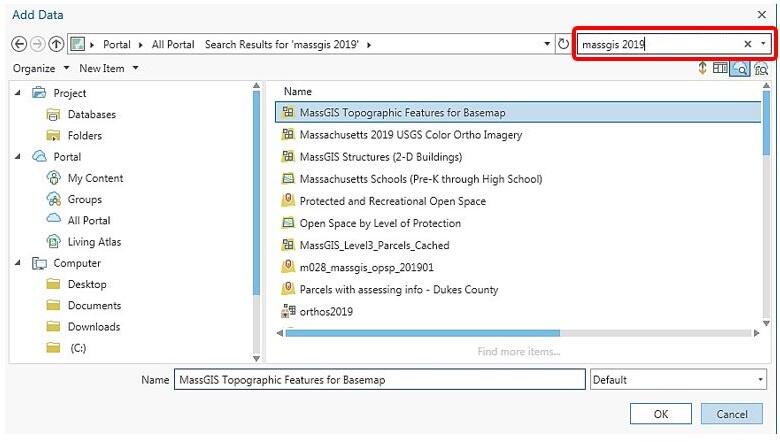
In the upper right in the “Search Portal: All Portal” type "massgis 2019" and hit Enter. Double click on “MassGIS 2019 USGS Color Ortho Imagery”.

Or for the 2021, find the "2021 Aerial Imagery"

ArcGIS Pro Step 4

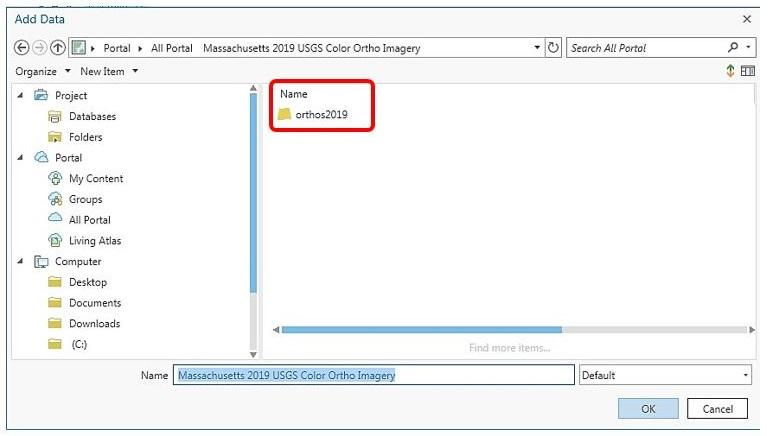
Double click on “orthos2019” or "2021 Aerial Imagery"

ArcGIS Pro Step 5

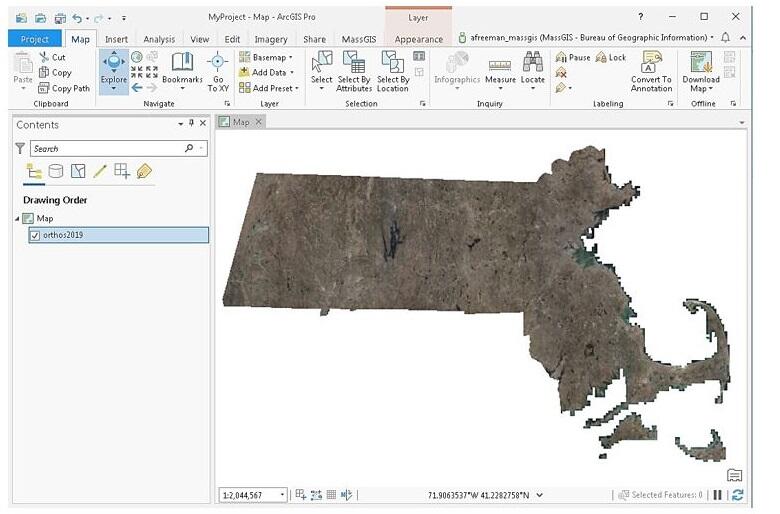
The orthos will be added to the map:

ArcPro Step 6

Instructions for adding the 2019 or 2021 orthos to ESRI’s ArcGIS Online

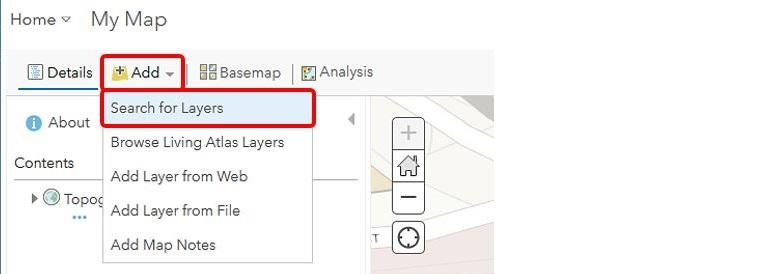
It is possible to use the 2019 or 2021 orthos in an ArcGIS Online map as a layer or a basemap.  After signing in to ArcGIS Online, create a new Map or open an existing one. Then, click on the “Add” dropdown and choose “Search for Layers”.

AGOL Step 1

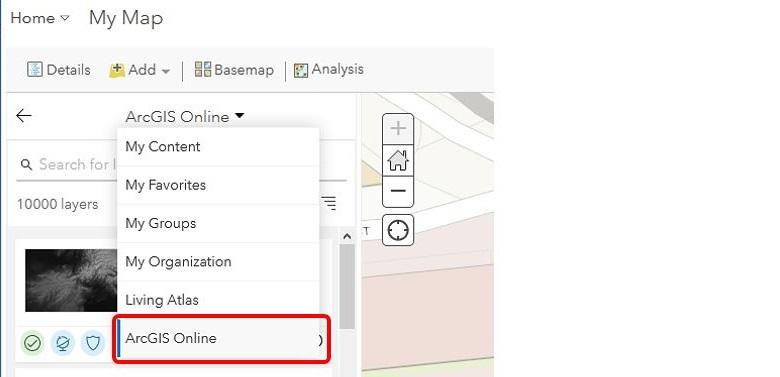
Click on the dropdown to choose “ArcGIS Online”.

AGOL Step 2

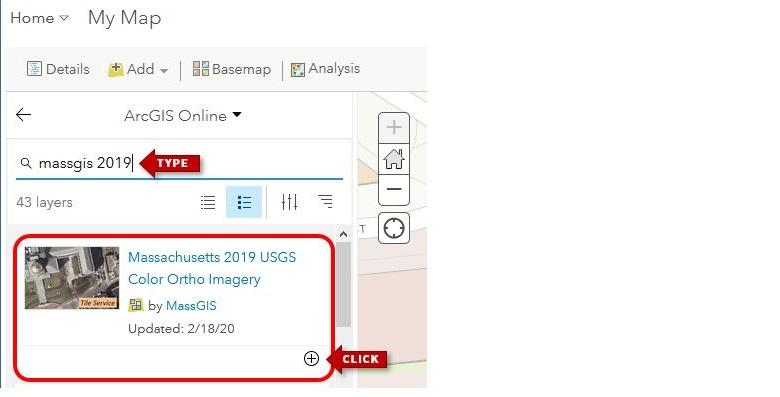
Type "massgis 2019" or "2021 Aerial Imagery" in the “Search for layers” box and hit Enter. Click the circled plus sign to add it to the map as a layer.

AGOL Step 3

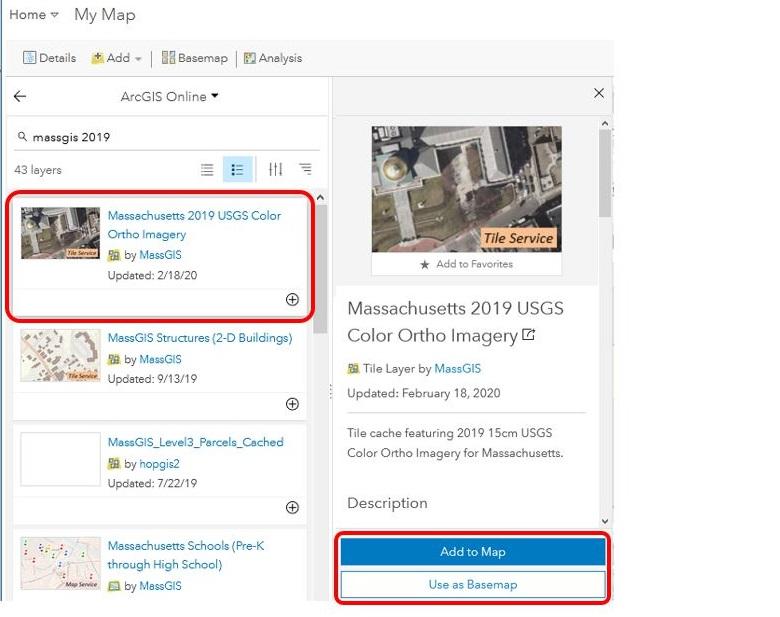
You can also click on the blue link labeled “Massachusetts 2019 USGS Color Ortho Imagery” or "2021 Aerial Imagery", and additional information will appear to the right.  Click on the blue “Add to Map” button or circled plus sign to add it as a layer. Click on "Use as Basemap" to replace your map's current basemap with the MassGIS orthos.

AGOL Step 4

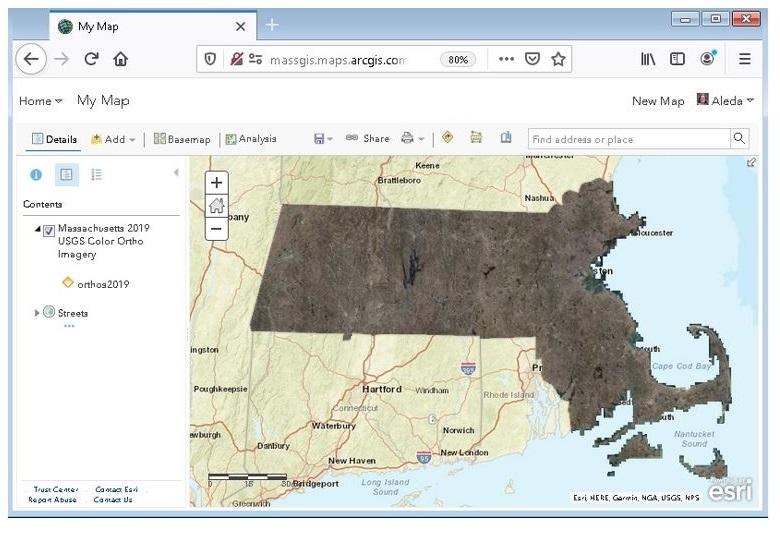
The orthos will be added to the map:

AGOL Step 5

Instructions for adding the 2019 or 2021 orthos as a WMTS service

The 2019 and 2021 orthos are also available as a WMTS standard service. This type of service can be added to many applications, including most other GIS software and online mapping resources. To do so use this URL for the 2019:

https://tiles.arcgis.com/tiles/hGdibHYSPO59RG1h/arcgis/rest/services/USGS_Orthos_2019/MapServer/WMTS/1.0.0/WMTSCapabilities.xml

Or use this URL for the 2021 images: https://tiles.arcgis.com/tiles/hGdibHYSPO59RG1h/arcgis/rest/services/orthos2021/MapServer/WMTS/1.0.0/WMTSCapabilities.xml

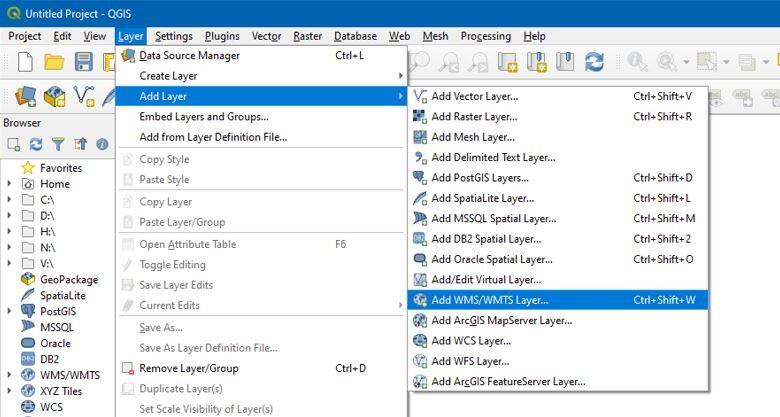
For example, to add the orthos to QGIS (free, open source GIS software), add or open a map and click on the Layer menu and choose “Add Layer” > “Add WMS/WMTS Layer”.

QGIS Step 1

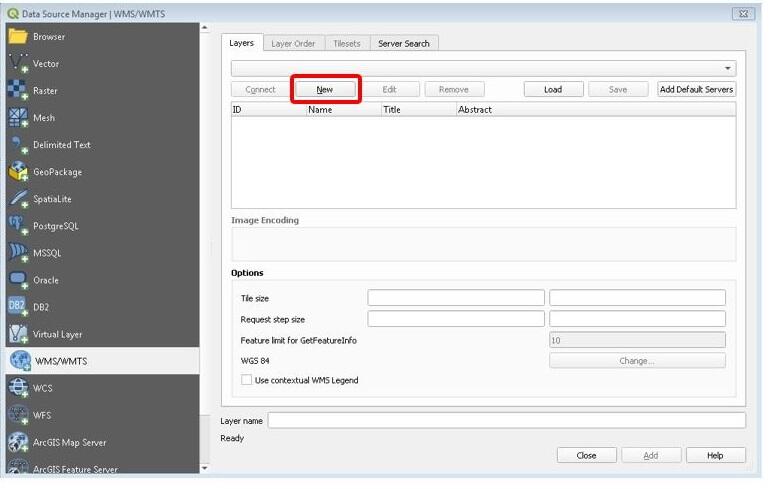
In the dialog click on the “New” button.

QGIS Step 2

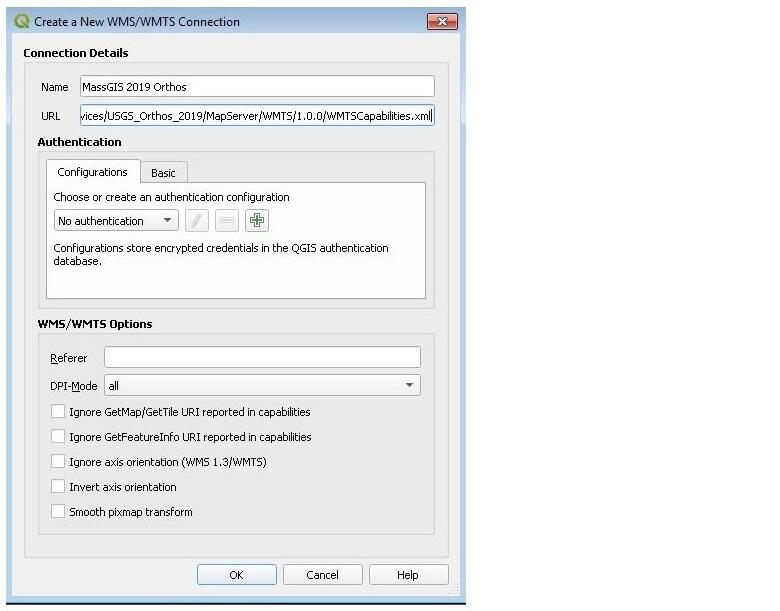
Fill out the dialog box to create a connection as shown here, using the above URL in the URL box. Then click OK:

QGIS Step 3

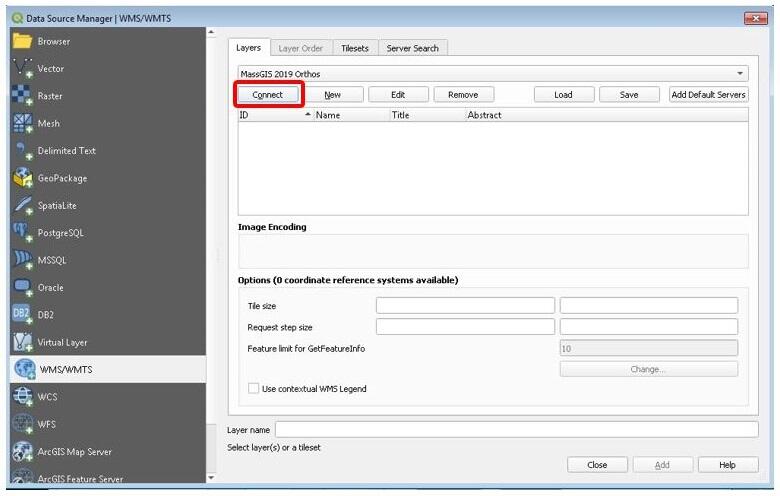
The layer with the name you chose will appear in the list in the Layers tab. Below that, click the “Connect” button and the Layer “USGS_Orthos_2019” or"2021 Aerial Imagery" will appear. 


QGIS Step 4

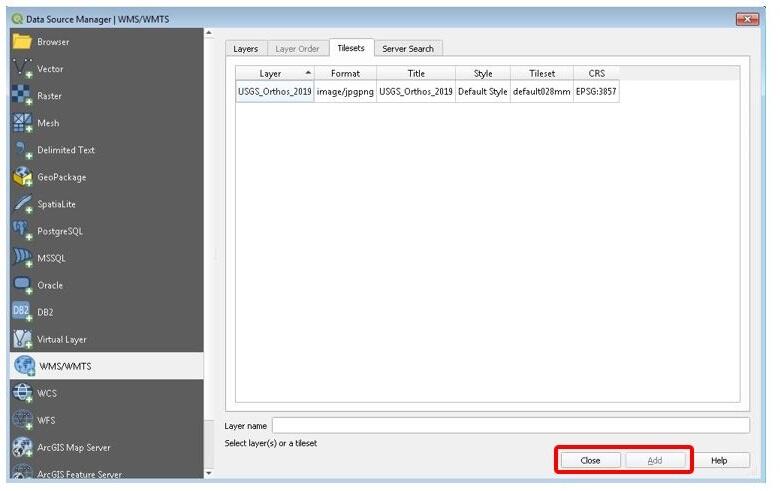
Highlight the layer row and click the “Add” button in the lower right. Then click the “Close” button to close the dialog.

QGIS Step 5

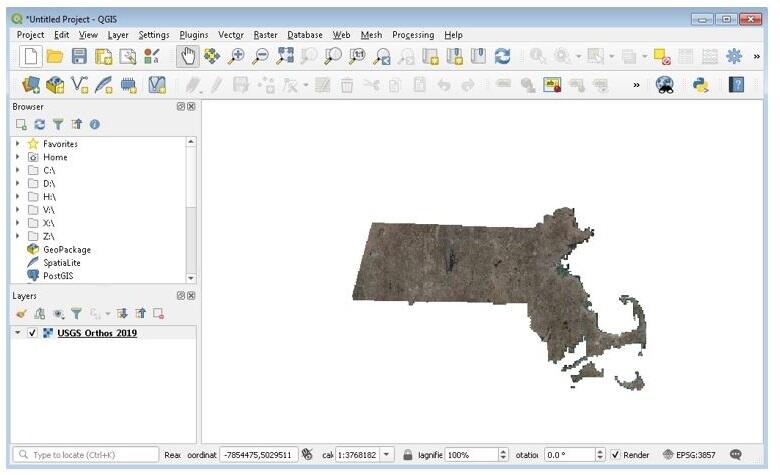
 The layer is added to the map:
QGIS Step 6

Using the Orthos in CAD and Civil 3D

Autodesk products do not support the use of WMTS webservices. Users will need to download individual JPEG 2000 tiles. MassGIS does not have any Autodesk or other CAD products; therefore we cannot test, nor can we create illustrated step by step instructions. Users may find this resource helpful.

Help Us Improve Mass.gov  with your feedback

Please do not include personal or contact information.
Feedback