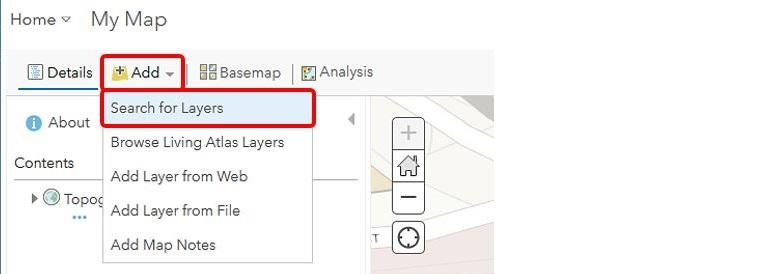
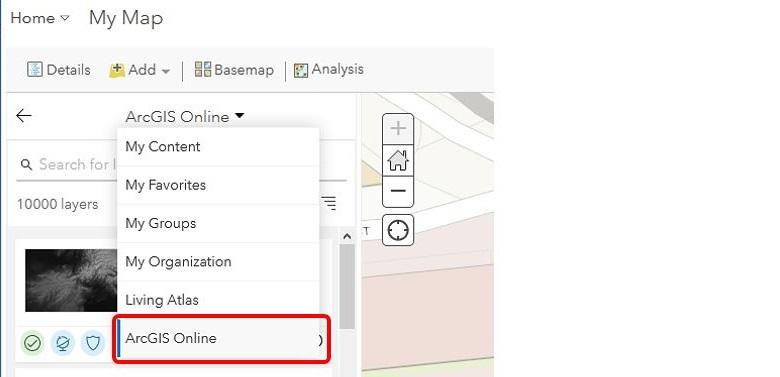
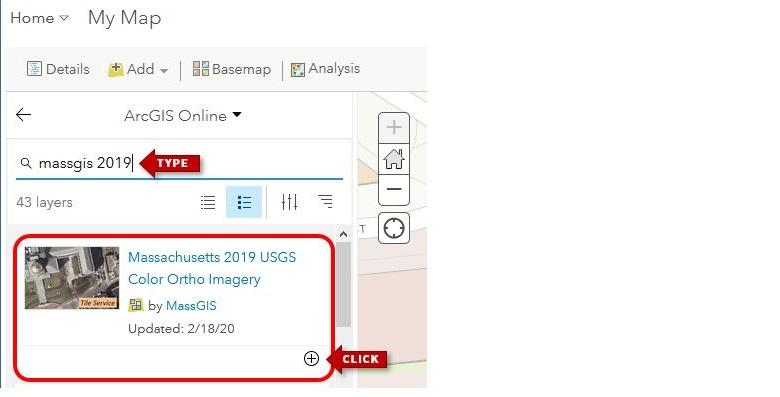
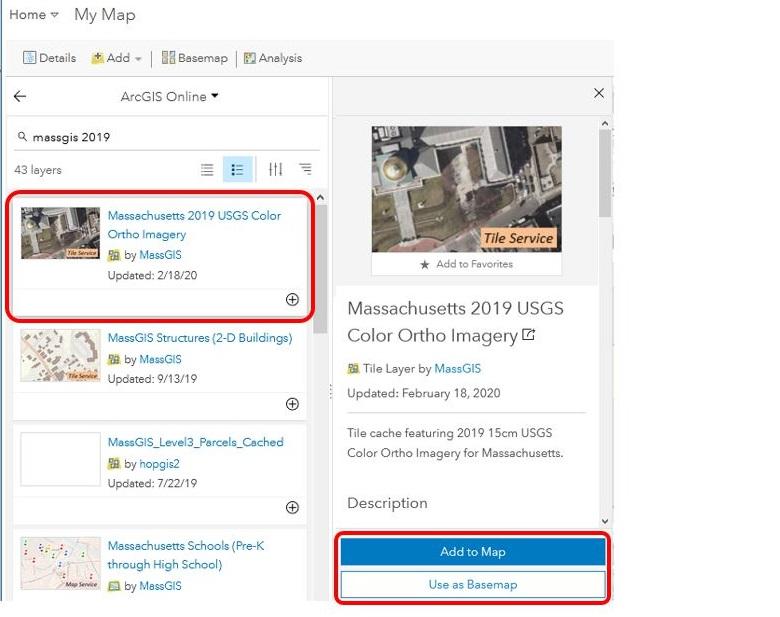
The MassGIS aerial imagery is also available as WMTS standard services. These services can be added to many applications, including most other GIS software and online mapping resources. To do so use these URLs:
The URL for the 2019 Imagery
The URL for the 2021 imagery
The URL for the 2023 imagery
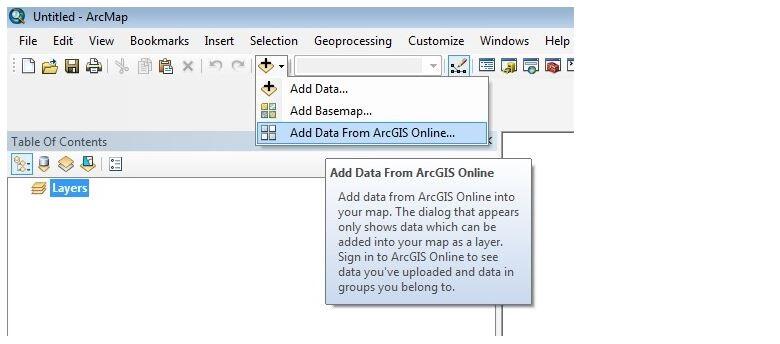
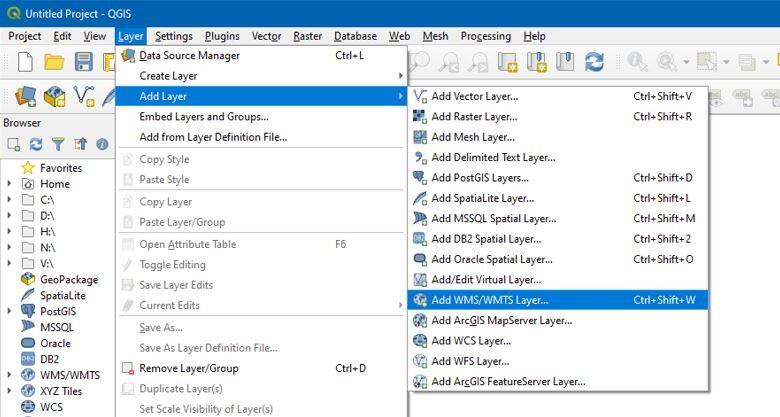
For example, to add the image layer to QGIS (free, open source GIS software), add or open a map and click on the Layer menu and choose “Add Layer” > “Add WMS/WMTS Layer”.
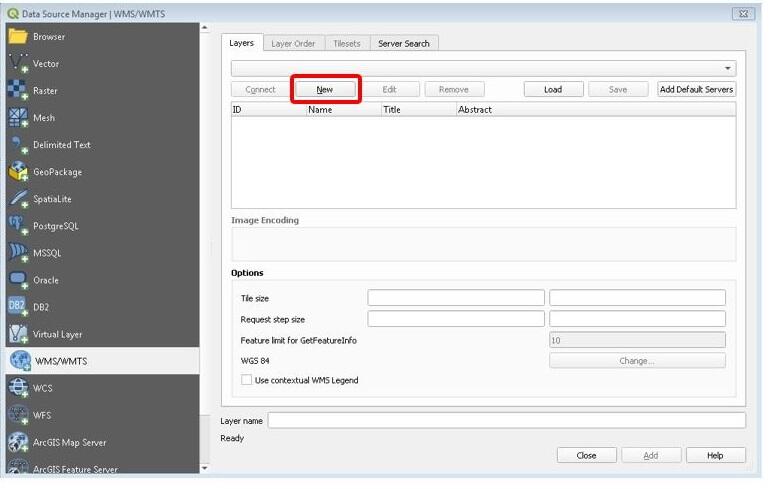
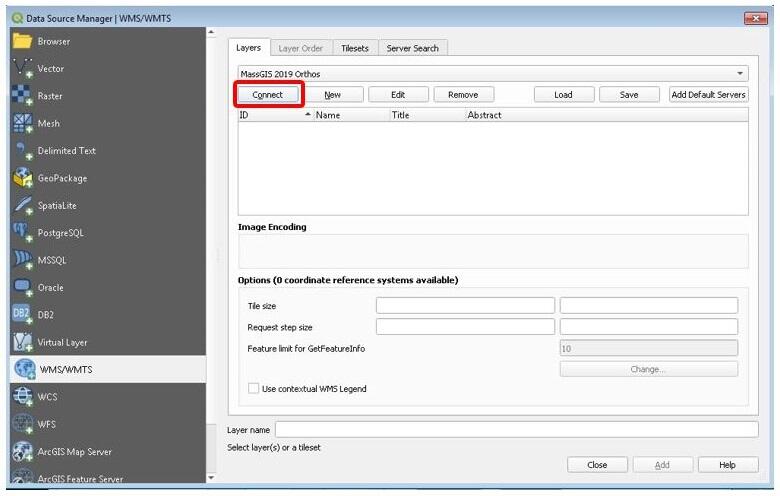
In the dialog click on the “New” button.
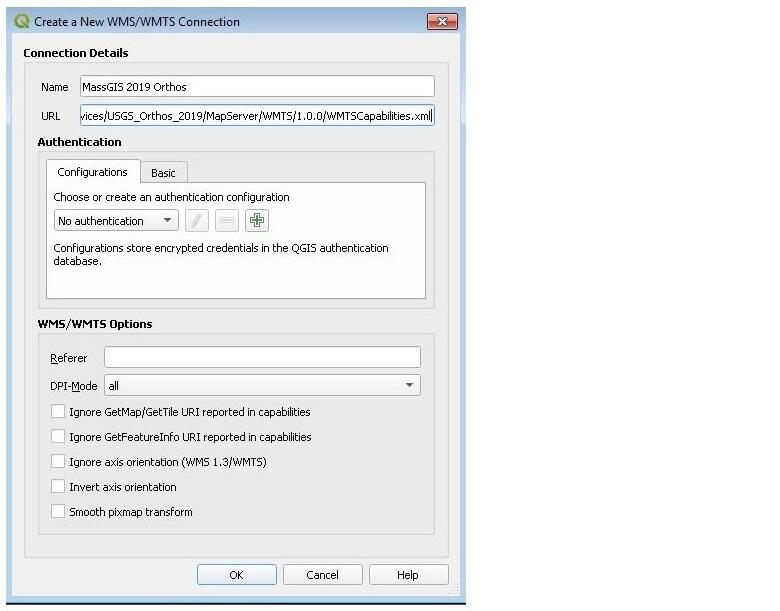
Fill out the dialog box to create a connection as shown here, using the above URL in the URL box. Then click OK:
The layer with the name you chose will appear in the list in the Layers tab. Below that, click the “Connect” button and the Layer “USGS_Orthos_2019” or"2021 Aerial Imagery" will appear.
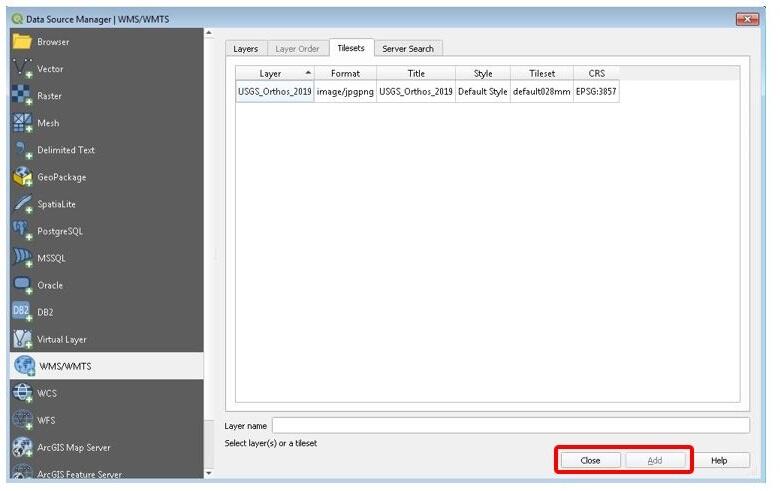
Highlight the layer row and click the “Add” button in the lower right. Then click the “Close” button to close the dialog.
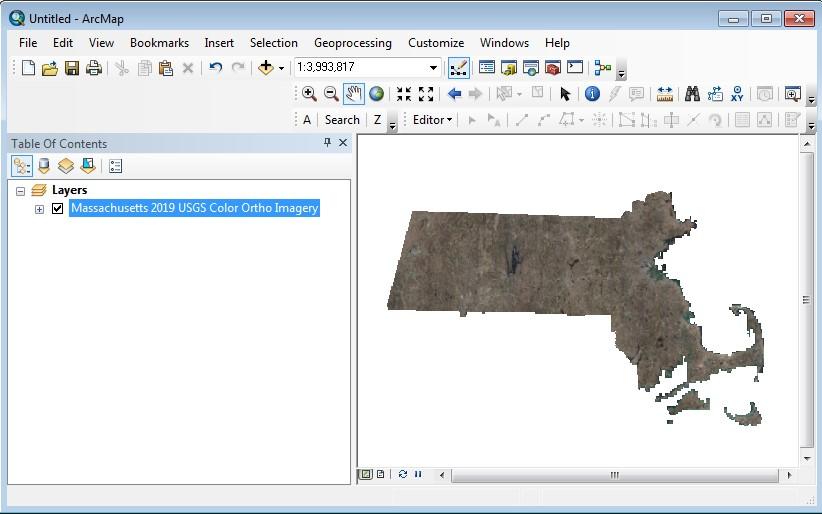
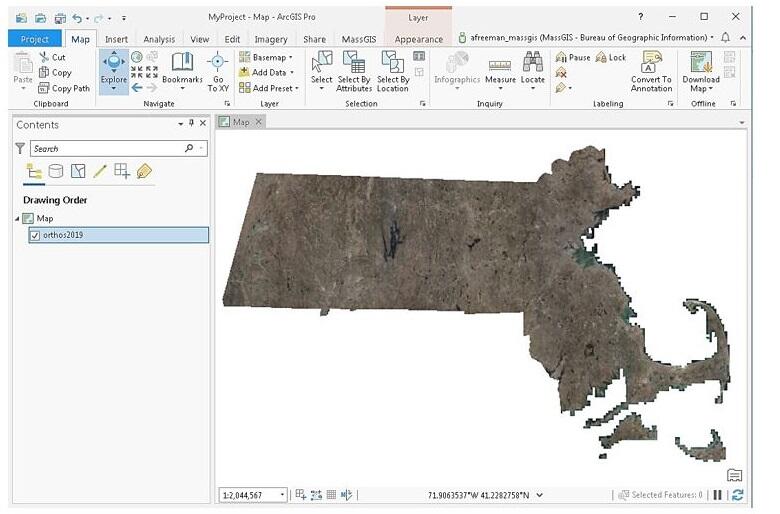
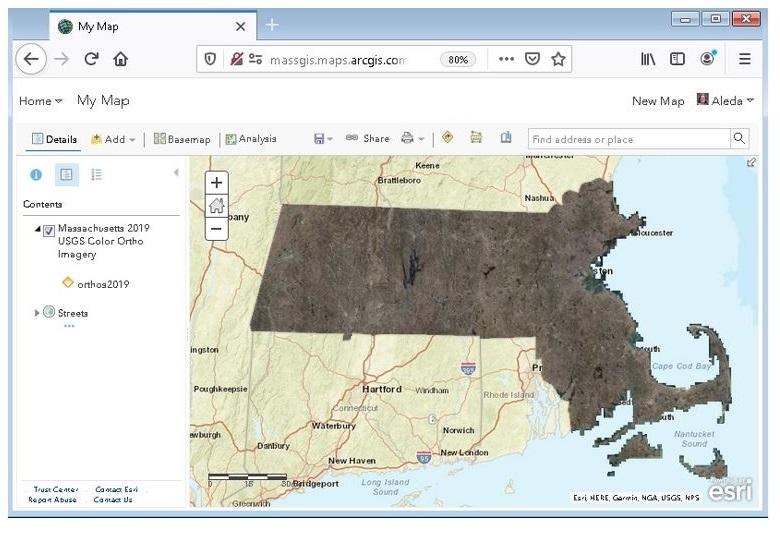
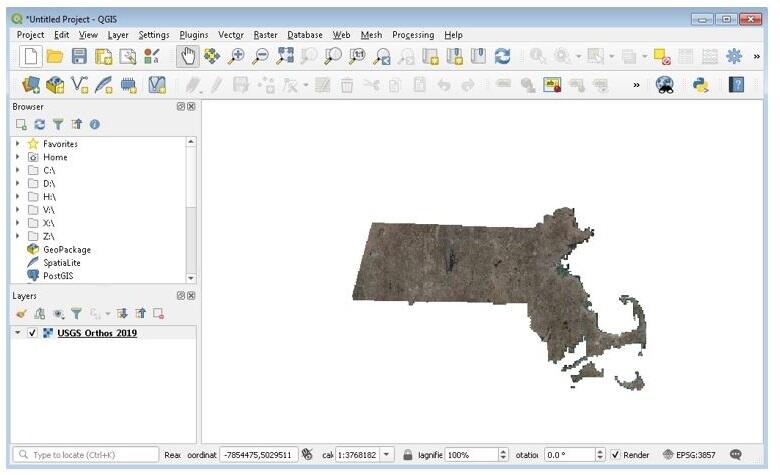
The layer is added to the map: