Instructions for Esri’s ArcGIS Pro
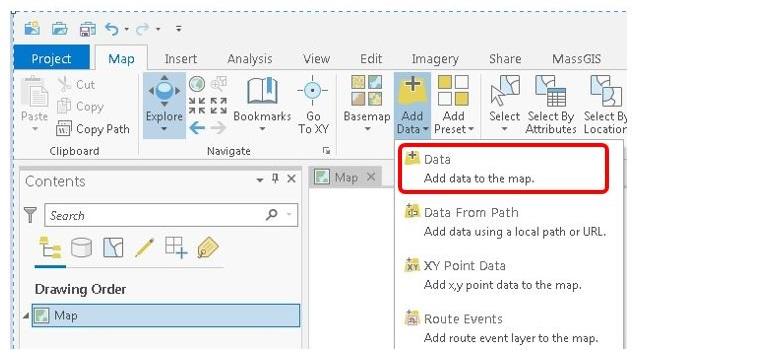
Click on the "Add Data" dropdown in the Layer section

Choose "Data - Add data to the map"
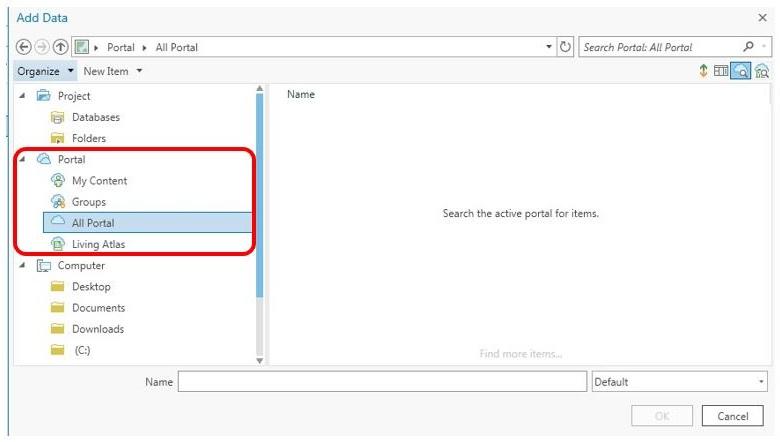
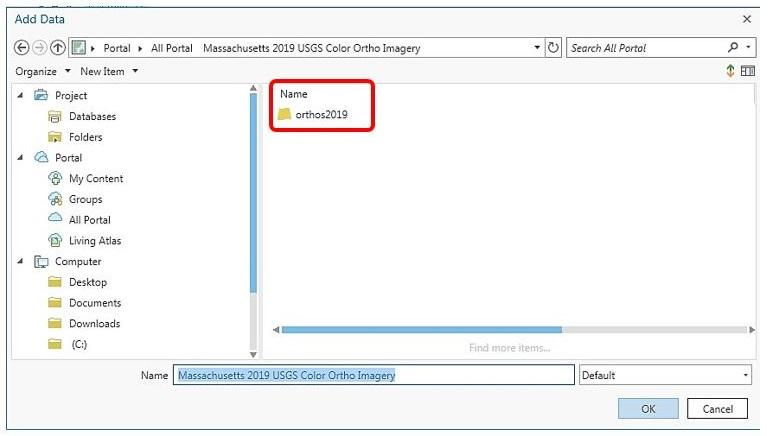
Click on “All Portal” under “Portal”
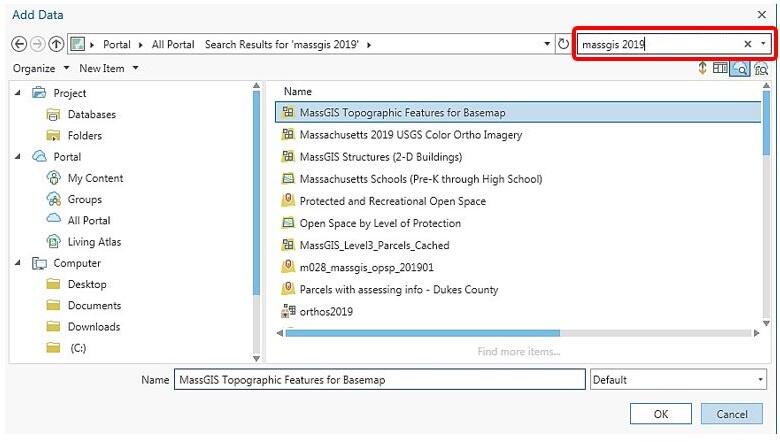
In the upper right in the “Search Portal: All Portal” type "massgis 2019" and hit Enter. Double click on "MassGIS 2019 USGS Color Ortho Imagery".
Double click on "orthos2019”
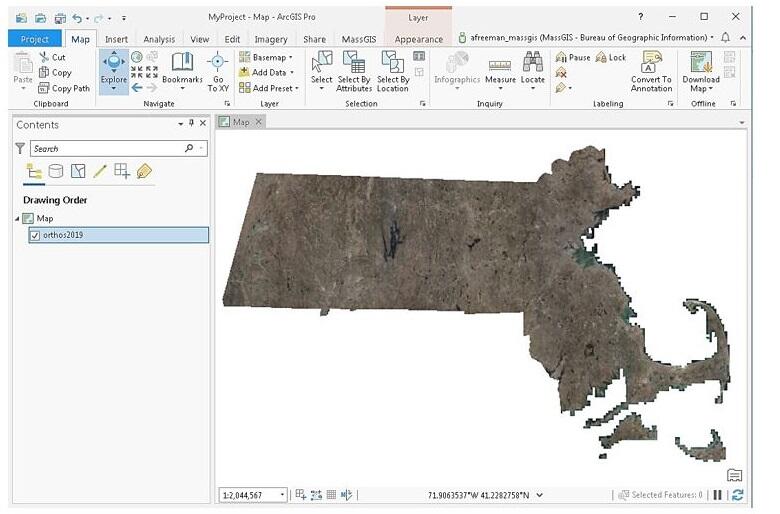
The orthos will be added to the map:
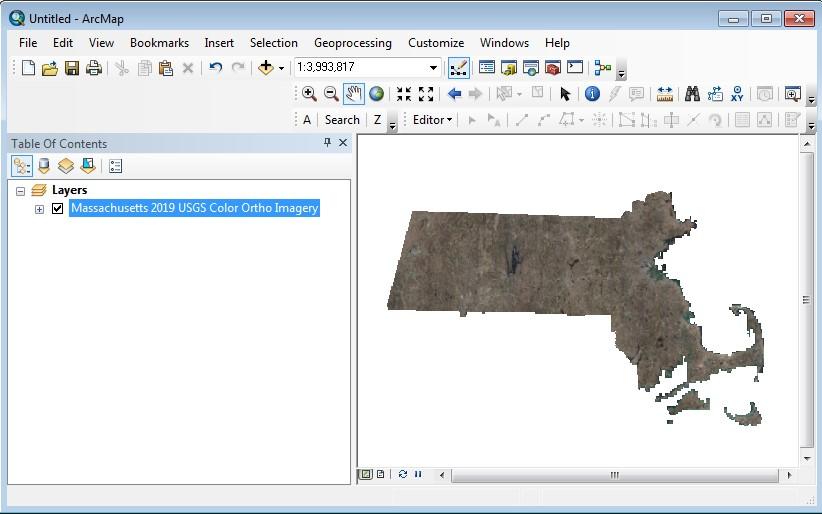
Instructions for Esri’s ArcMap
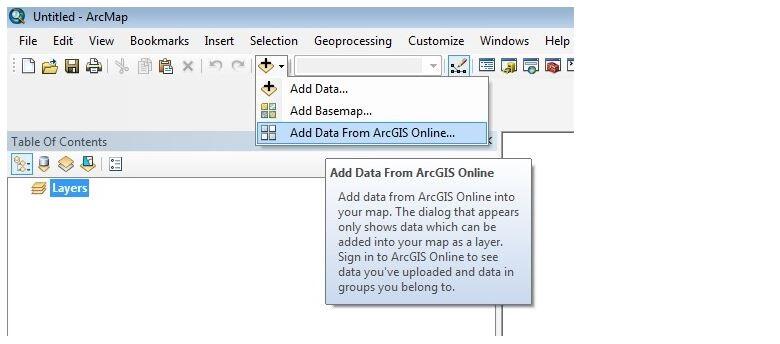
Click the little triangle next to the Add Data button and choose "Add Data From ArcGIS Online…". (You can also choose Add Data > Add Data From ArcGIS Online… from the File menu).
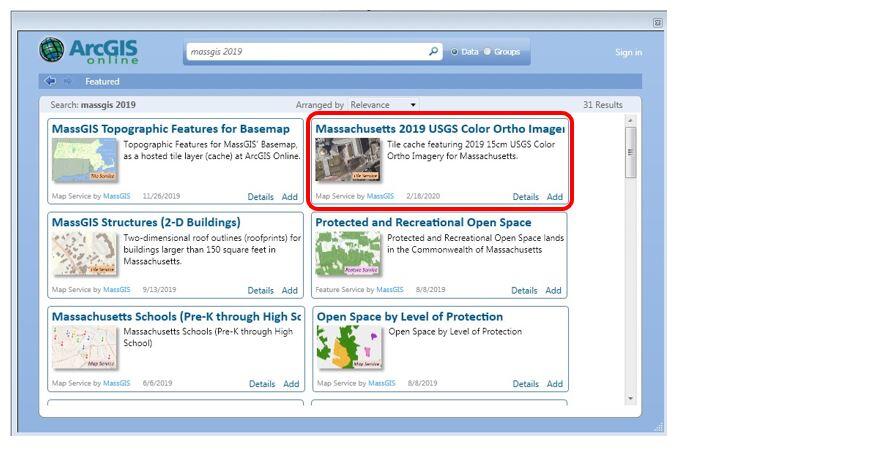
In the ArcGIS Online search box type "MassGIS 2019" and hit Enter. Find the tile labeled "Massachusetts 2019 USGS Color Ortho Imagery" and click the blue "Add" link in the lower right of the tile.
The orthos will add to the map:
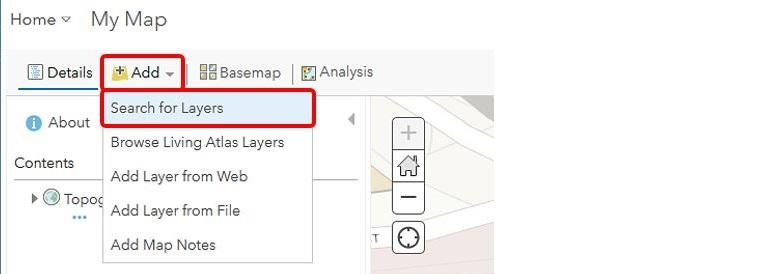
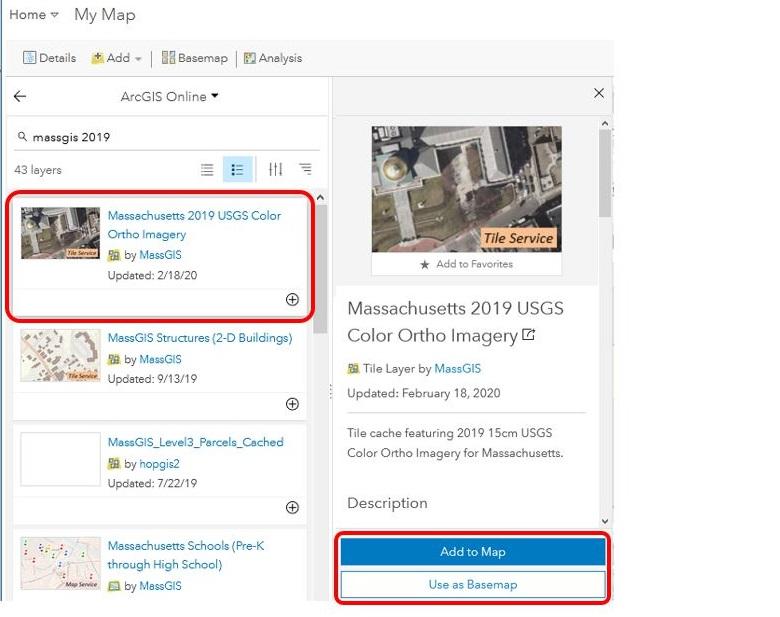
Instructions for Esri’s ArcGIS Online web maps
You can add MassGIS web services to ArcGIS Online maps as a layer or a basemap. After signing in to ArcGIS Online, create a new Map or open an existing one. Then, click on the "Add" dropdown and choose "Search for Layers".
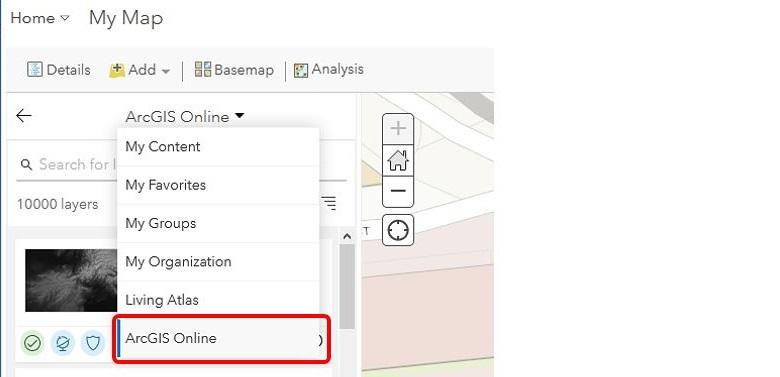
Click on the dropdown to choose "ArcGIS Online".
Type "massgis 2019"" in the "Search for layers" box and hit Enter. Click the circled plus sign to add it to the map as a layer.
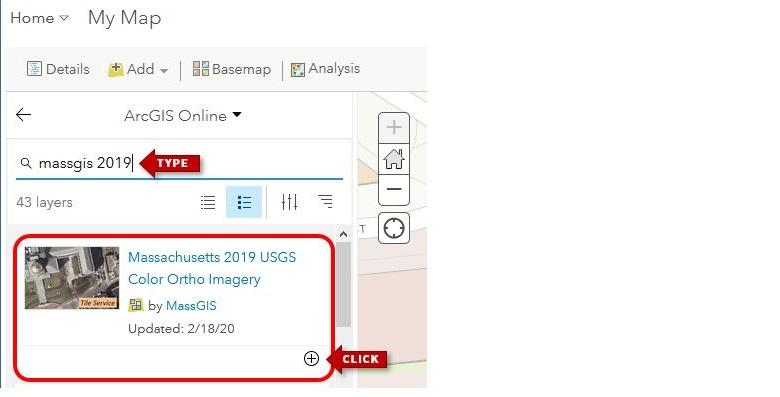
You can also click on the blue link labeled "Massachusetts 2019 USGS Color Ortho Imagery" and additional information will appear to the right. Click on the blue "Add to Map" button or circled plus sign to add it as a layer. Click on "Use as Basemap" to replace your map's current basemap with the MassGIS orthos.
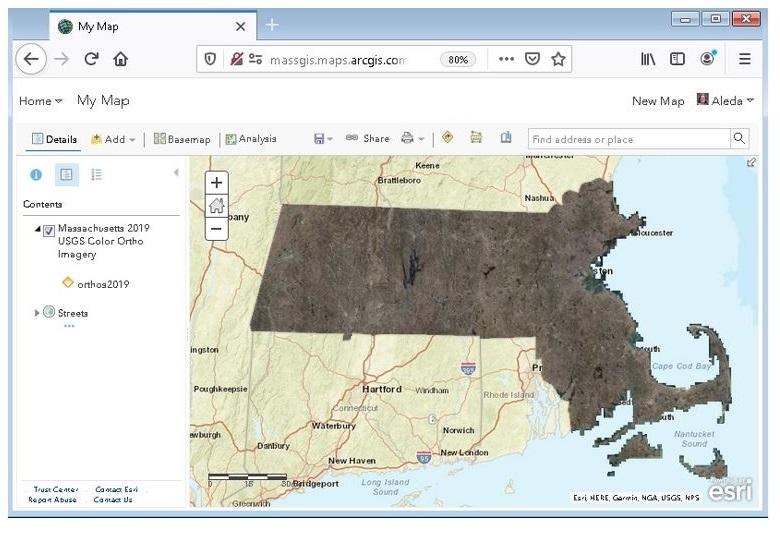
The orthos will be added to the map:
Instructions for adding a layer as a WMTS service
MassGIS' tile layers are also available as a WMTS standard service. This type of service can be added to many applications, including most GIS software and online mapping resources.
The format for the URL is:
https://tiles.arcgis.com/tiles/hGdibHYSPO59RG1h/arcgis/rest/services/ServiceName/MapServer/WMTS/1.0.0/WMTSCapabilities.xml
To find the service name, visit the MassGIS Tile Layer Gallery. For each layer, click "..." > "View Details" and in the lower right of the page, in the URL section, click View. In the URL of that page, the text string between "services/" and "/MapServer" is what to substitute for ServiceName.
For example, use this URL for the 2019 imagery:
https://tiles.arcgis.com/tiles/hGdibHYSPO59RG1h/arcgis/rest/services/USGS_Orthos_2019/MapServer/WMTS/1.0.0/WMTSCapabilities.xml
Use this methodology when adding layers to QGIS (see next section).
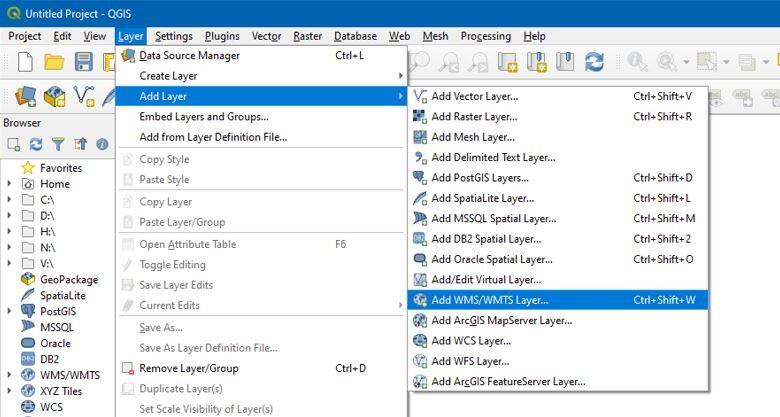
Instructions for QGIS
To add the orthos to QGIS (free, open source GIS software), add or open a map and click on the Layer menu and choose "Add Layer" > "Add WMS/WMTS Layer".
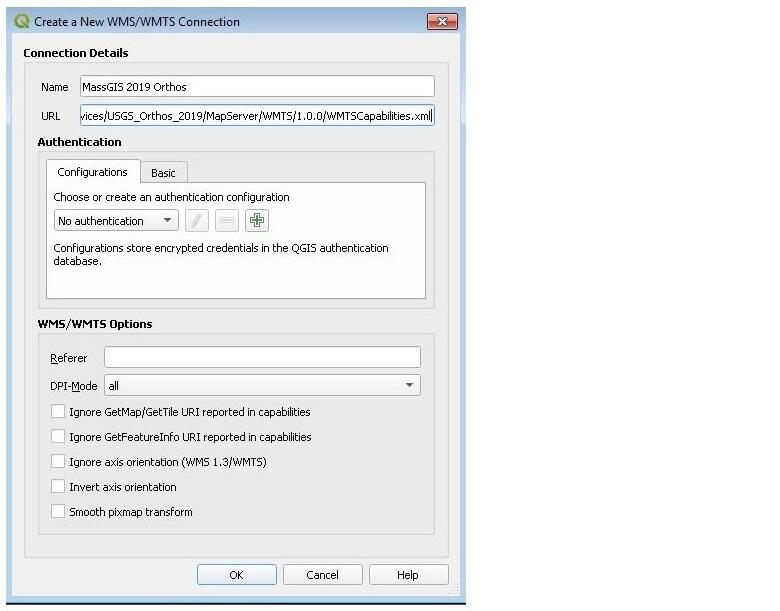
In the dialog click on the "New" button.
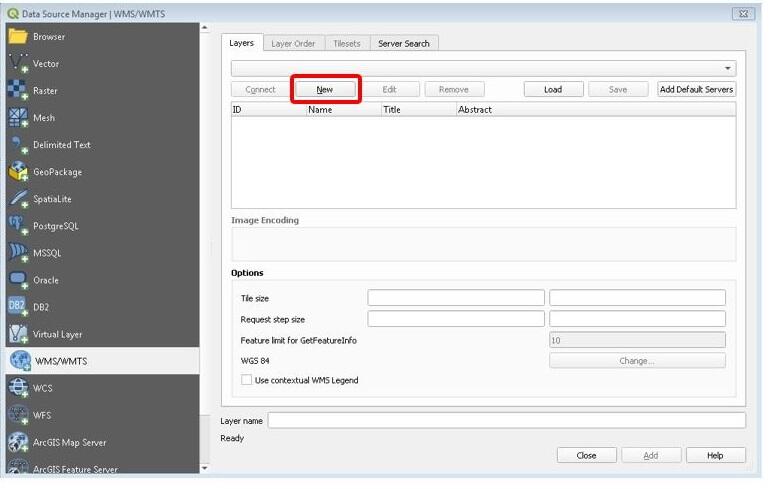
Fill out the dialog box to create a connection as shown here. For the URL box, use the methodology and syntax as described in the previous section. Then click OK:
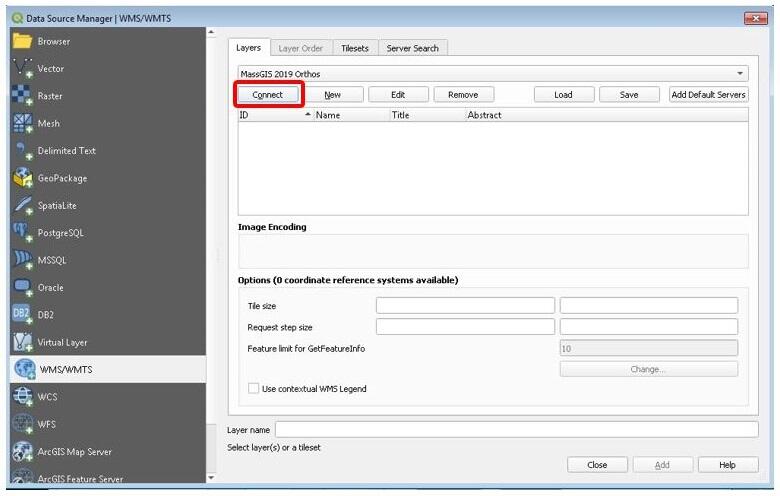
The layer with the name you chose will appear in the list in the Layers tab. Below that, click the "Connect" button and the Layer "USGS_Orthos_2019" will appear.
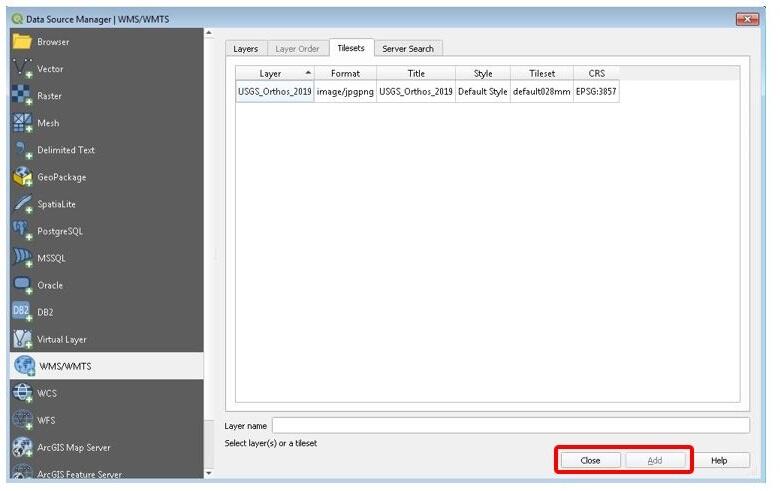
Highlight the layer row and click the "Add" button in the lower right. Then click the "Close" button to close the dialog.
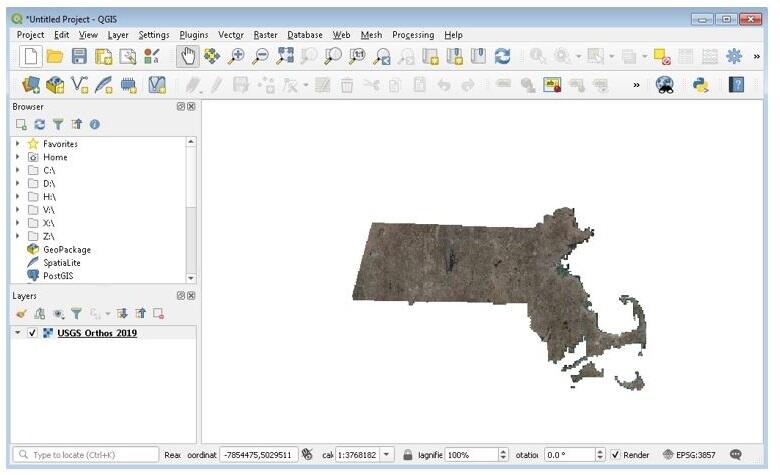
The layer is added to the map: