Using ArcMap
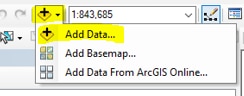
Step 1: Once you have opened your .mxd, click on the Add Data dropdown and click Add data.
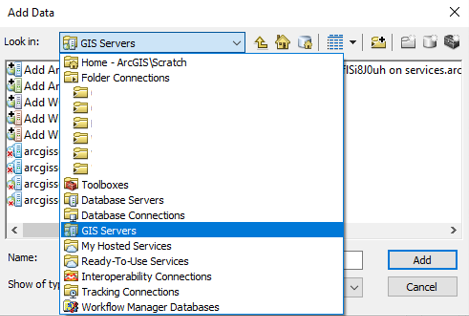
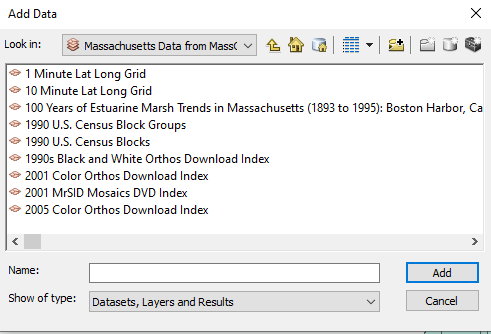
Step 2: The window will have multiple options, double-click on GIS Servers.
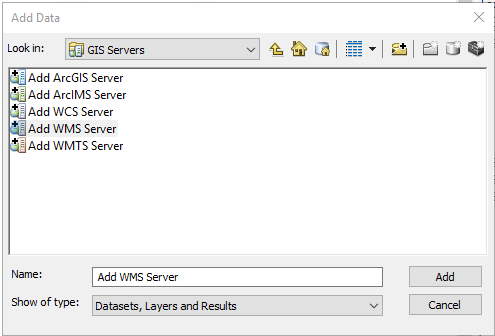
Step 3: Double-click Add WMS Server.
Step 4: A window will appear where you will add https://gis-prod.digital.mass.gov/geoserver/wms (be careful not to duplicate the https://). No need to fill in any other fields.
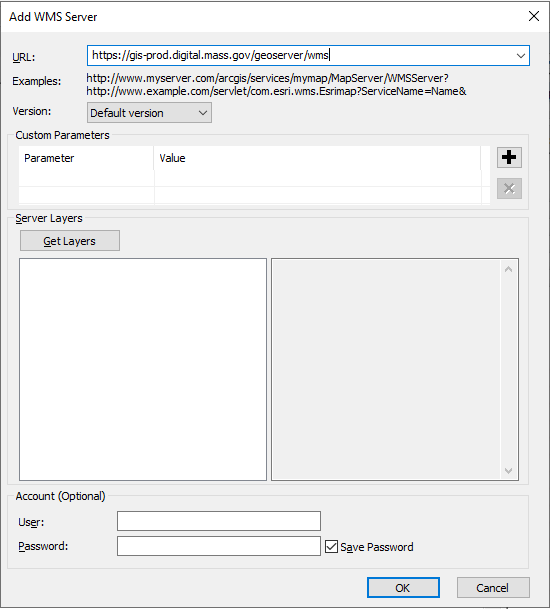
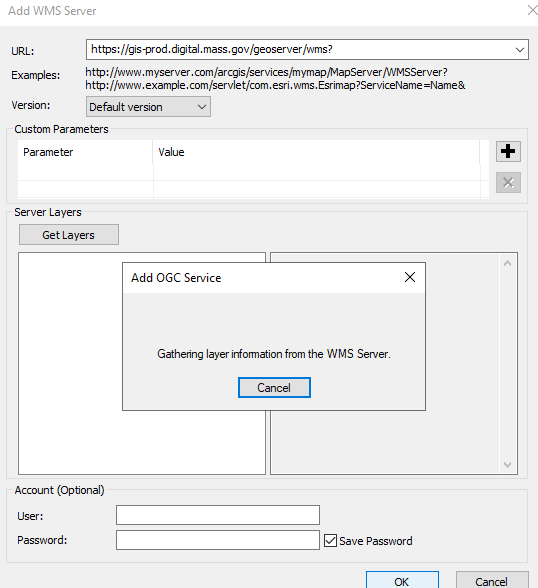
Step 5: Click OK. A "working on it" popup will appear and the URL will appear in the Name: window and will persist as one of your connections.
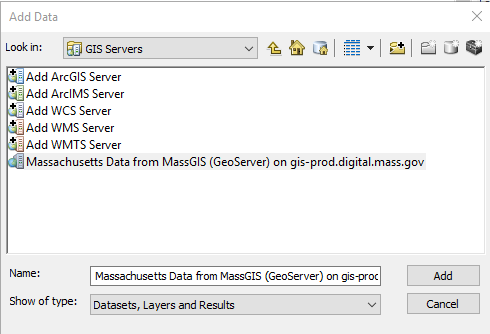
Step 6: You are now ready to explore the list of layers in GeoServer by clicking on the Add button; then this list will appear:
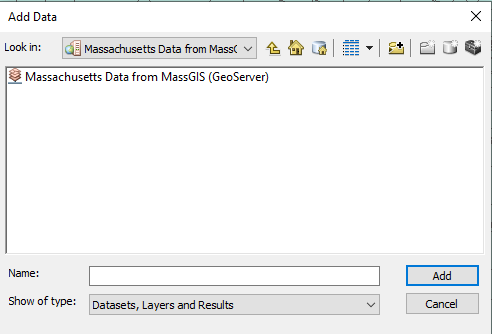
Step 7: Once you have scrolled through the list and found your layer, double-click it to add it to the map. You may get a Transformation error popup that you can dismiss.
Using ArcGIS Pro
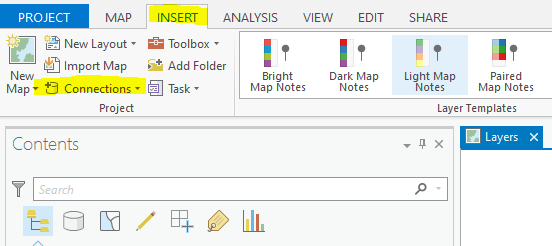
Step 1: Open your Project, click the Insert tab, and then open the Connections dropdown.
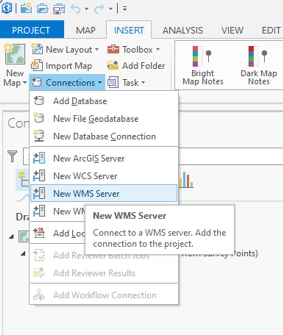
Step 2: In the Connections dropdown, select New WMS Server.
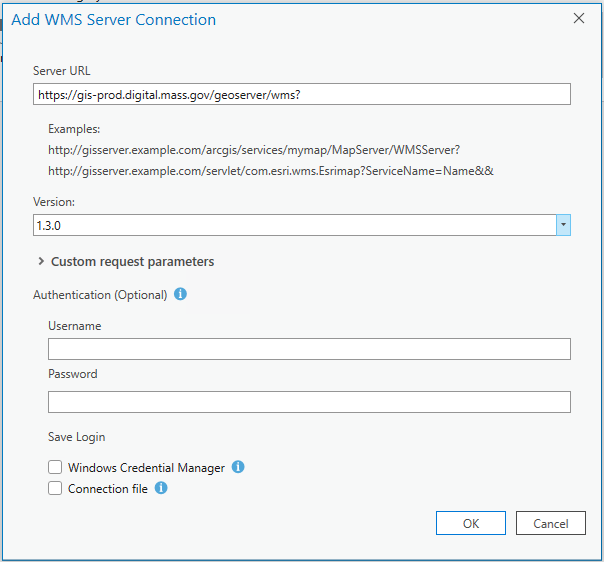
Step 3: In the Add WMS Server Connection popup, paste https://gis-prod.digital.mass.gov/geoserver/wms into the Server URL window and click OK.
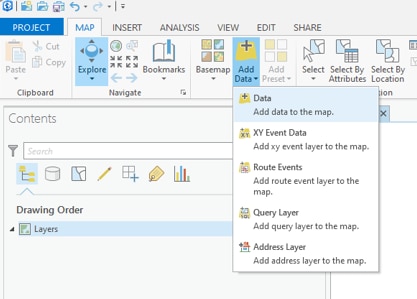
Step 4: Click on the Map tab to return to the map, then click on the Add Data button and click on the first selection: Data
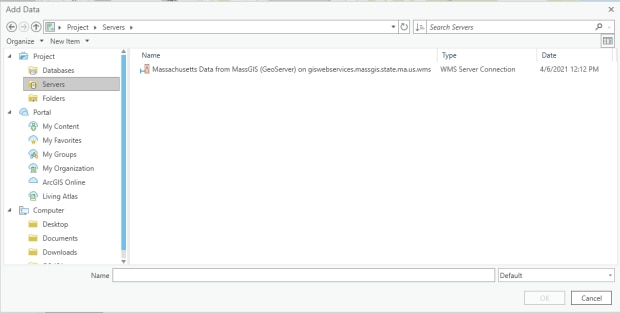
Step 5: There will now be a Servers option in the left column; click that and in the right pane you should see:
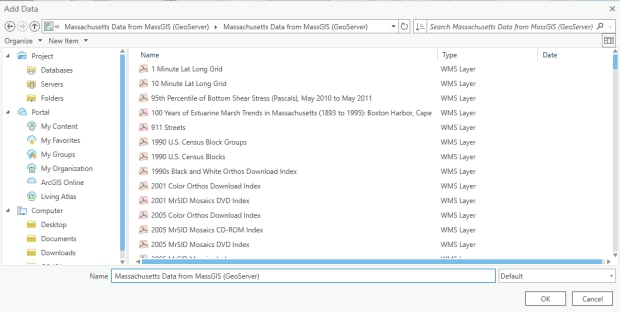
Step 6: Double-click the GeoServer connection in the right pane, which will expose the list of available data. Double-click your layer so it appears in the map.
Using QGIS
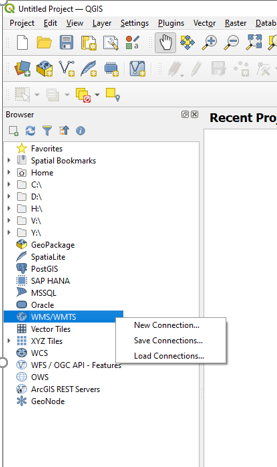
Step 1: Open QGIS and in the Browser pane, right click on WMS/WMTS, and select New Connection:
Step 2: This popup will appear:
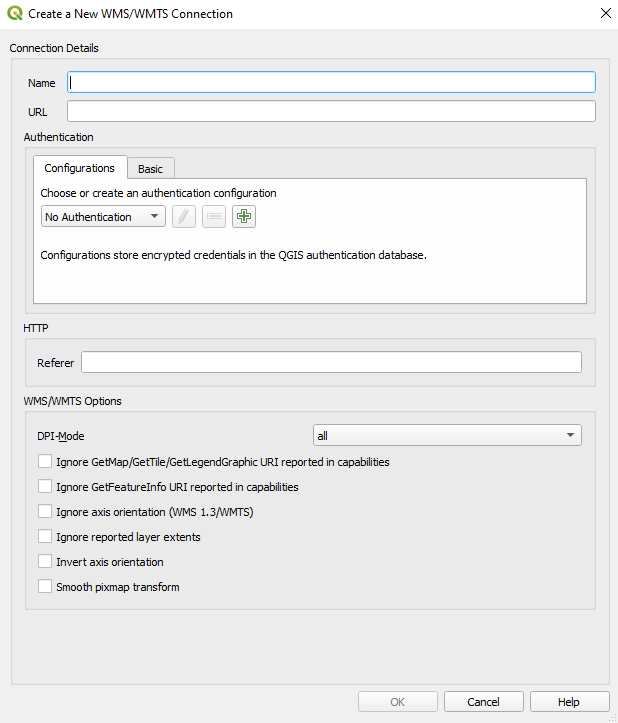
Step 3: In the Name window, type MassGIS (or whatever you want). Then copy/paste this URL into the URL window: https://gis-prod.digital.mass.gov/geoserver/wms. Then click OK.

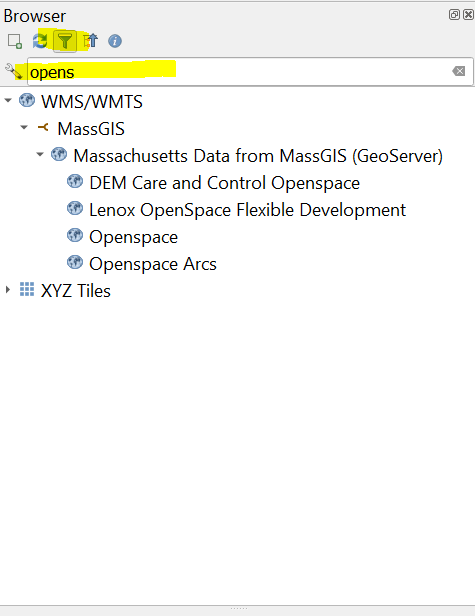
Step 4: After clicking on 'WMS/WMTS' in the Browser pane, you’ll see the MassGIS (or whatever you named it) connection. Double click Massachusetts Data from MassGIS (GeoServer).
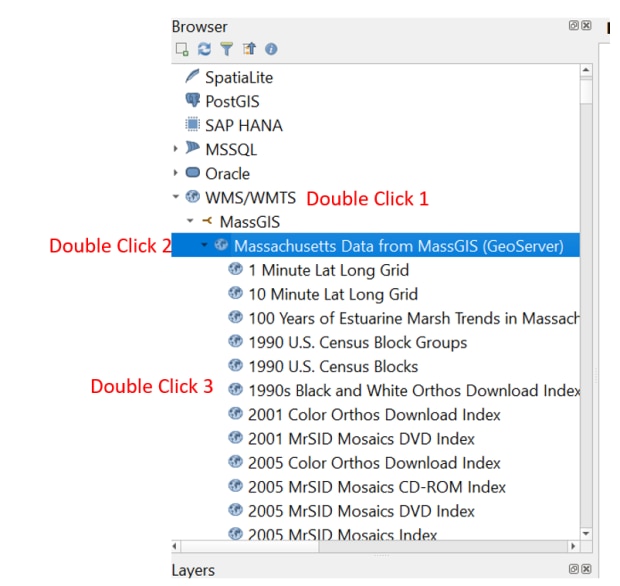
To find layers, you can either scroll through the list and double-click your layer of interest or use the filter tool by entering keywords.